Showing posts with label NOTD. Show all posts

Sunday, November 17, 2013

Review: Etude House Ice Cream Nails (#BR401) & Look At My Nails (#OR202)

Price: RM 4.10 each with free shipping
Availability: Etude House
I bought these on Qoo10 when they were on sale. My sister bought the yellow and lime Ice Cream Nails from Korea in July but I thought the colors weren't very easy to apply. I had to layer to create a polished effect.
So when the polishes arrived I didn't put my hopes up. Since I don't have a base coat nor a top coat with me, I just applied the polishes on my bare nails. Surprisingly the colours were so easy to apply. I only need one coat of Ice Cream nails for the perfect nude nails look.

And the Look at My Nails colour is so cute! looks so pudding like :) And smooth application too. I had them on for two weeks and they didn't chip! Wow. Even without a top coat and I was busy doing housechores at home. However this colour needs 2 coats at least for a completed look.
I saw Etude House released a new Play Nail Series but I will have to wait till the price goes down a bit hahaha! And my sister has too many nail colours at home so I haven't got a solid reason to splurge on that ;P

The good: Staying power, cheap price, wonderful colour choices, fast drying, good results even without base and top coat

The bad: nothing

Tuesday, July 16, 2013

NOTD Review: Etude House Juicy Cocktail Gradiation Nails #2 Kiss of Fire

Volume: 4ml x 3
Price: I got mine at RM 10.30 with FREE shipping! Can you believe that?
Description:


So this colour was chosen because the mint frappe and the purple one was out of stock. Anyway, back to the review.
The trio of nail colours came in a petite pink box which has minimal but understandable English instructions.
I remember Etude House nail  polishes as cute, fast drying with a wide variety of colours and this one is no exception.
This time I used all of the colours provided in the kit and also OPI's base and topcoat.
From left #1, #2, #3, OPI Base, Top coat
As per the instructions, you should layer #1 all over your nail followed by #2 starting from the middle of your nail. Now as #2 is quite thick, I suggest that you should not soak the brush with too much of the polish and press as hard as you can on your nail so that the brush opens widely and the colour comes out even and nice on your nail.


#3 was tricky. I find that the shimmery bits was a tad too big, it will be better if it's smaller. And it was super hard to get the shiny bits to stick on my nails -.-
Onto the results!!!!! 

Overall it gave my nails the very bling bling look, and I like it a lot. This nail colour kit will be more suitable for people with longer nails as the shimmery bits actually make your nails look short. Hahaha
The good: cheap, I love the colour

The bad: Tricky application

Sunday, June 30, 2013

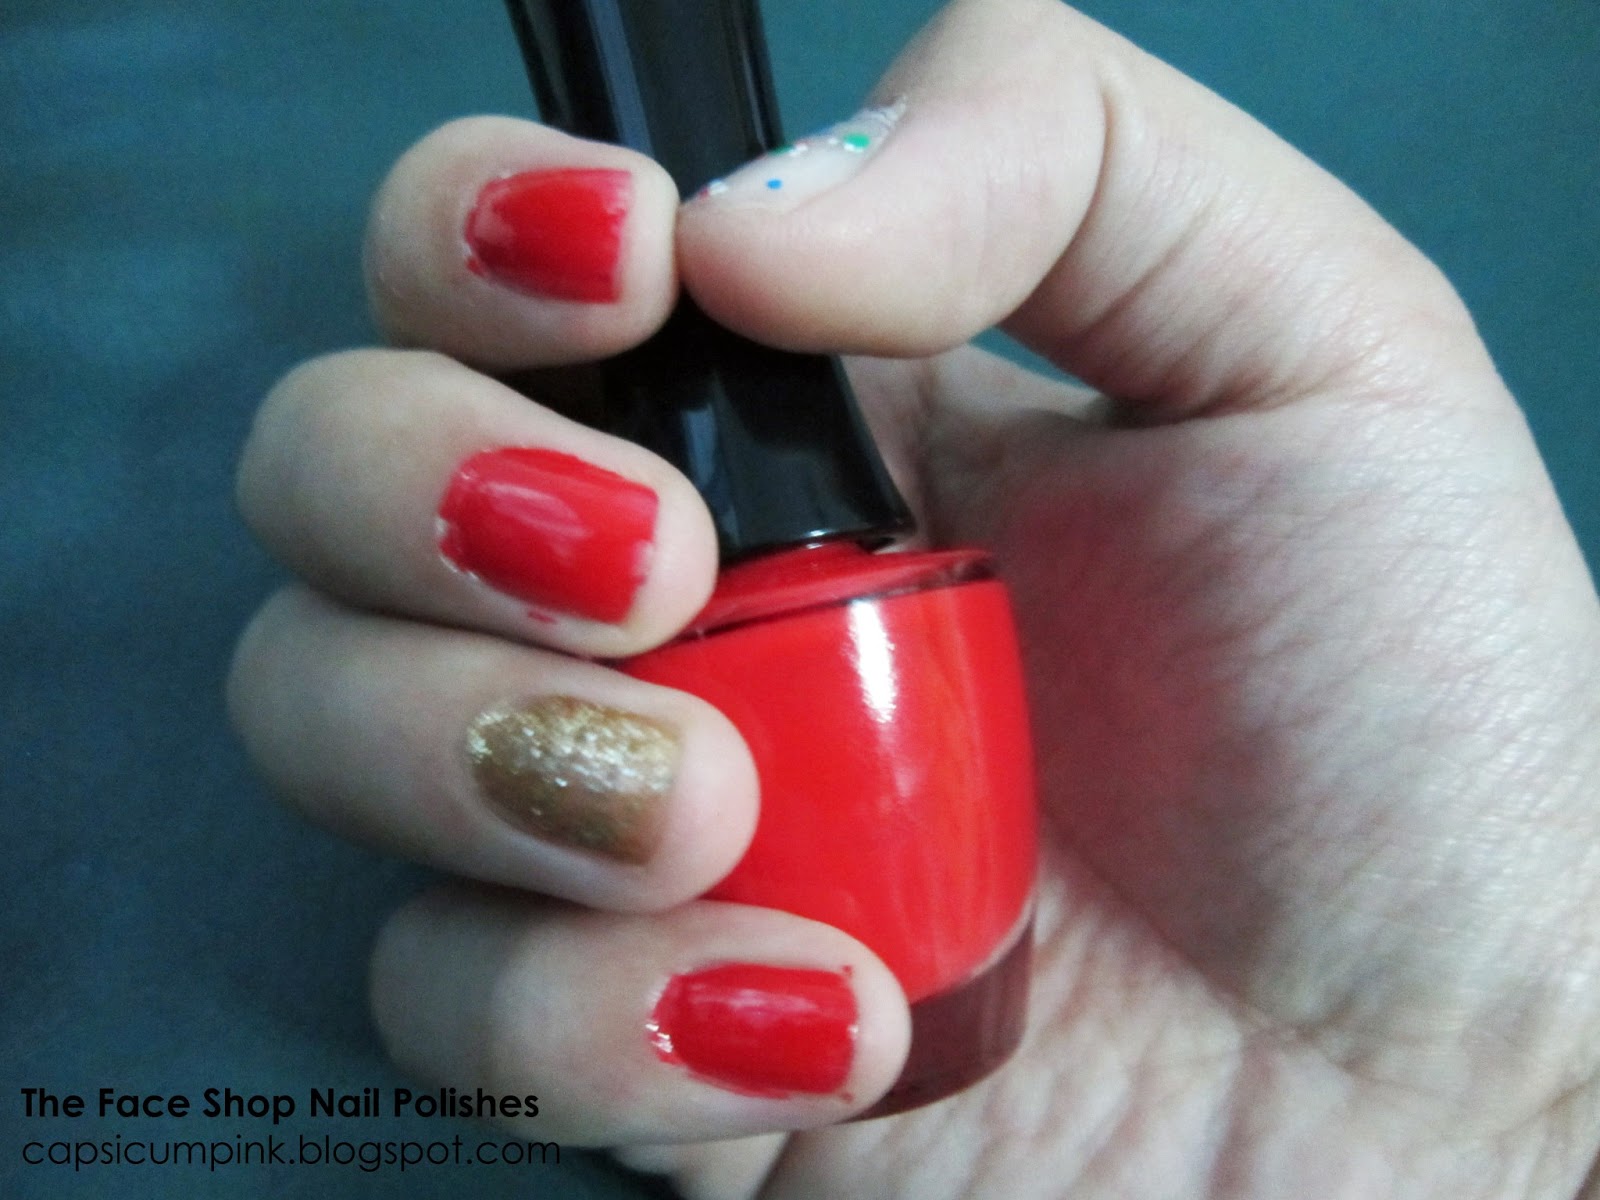
NOTD: The Face Shop Lovely ME:EX RD304 and Face It SL211 Nail Polish


Price: RM5.90 (Red) and RM10.90 (glitter)

Wee! This is the promised review of my new The Face Shop Nail Polish I just bought yesterday.

I have never tried red for my nails. I actually realized that red looked quite good on me when I played with my friend's nail polish a few days before. Sadly, hers was a bit clumped because the bottle broke, so I have decided to get one myself.

After incessant shop hopping in Sunway Pyramid, I've decided on TFS' nail polish, because the colours are very easy to apply and the price is cheaper than other shops!

So here are the 2 nail colours I've purchased!


My left hand, with the silver glitter on my middle finger.

My right hand, with gold glitter on my ring finger.


My skills are a bit sucky -.-; nevertheless the polish glides on smoothly.


With OPI base and top coat. TFS Red is only one coat, yet the colour turns out beautifully striking and gorgeous. Thumbs up for that!

Thursday, December 22, 2011

NOTD: SKIN FOOD Chocolate Smokey Chic Brown Makeup Nail Polish Kit Colors Set


Volume: 13.5ml (4.5ml x 3)

Price: RM 31.90

Description: Naturally delectable gradient nails are now within reach, even in the comfort of your own home! This starter kit contains three chocolaty hues with ultrafine glitter pearls.

Added vitamins and keratin boost shine and strength. Contains no formaldehyde, DBP or toluene


I got this free from the prize giving ceremony last 2 weeks. I have finally gotten to use it. This Chocolate Nail Color Kit

The colours are very classy with pearl glitters, and it is very easy to paint my nails with the colors. I personally think #2 dries faster than other colours.

First, I layer my nails with pink nail color as the base. The pink colour will bring out the chocolate brown, giving it a warm finish. I recommend sparkly strawberry pink colour, which will not be hidden after you use base #1 from the nail kit.

After that, you layer on the #1 base, be careful not to cover all the pink underneath! After waiting it dry, you colour #2 from the middle section of your nails. Don't make too messy. This colour marks the transition from colour # 1 to #3, therefore you should not overdo it. #3 is the last colour, and it is the darkest colour. Paint it at the 1/3 tip of your nail, and wait for it to dry. If you'd like a more smooth gradient transition, paint a thin layer of #1 onto your nail.

Left hand is with pink base and no gradient; Right hand has no pink base and yes to gradient

Lastly, you can paint a transparent top coat (with glitter) on top of your nail. Make sure to put more glitter on the tip, it'll emphasize the classiness. Here I just did basic layering without the topcoat. If you like 3D nails, put on some nail accessories :) I'm using Naga Nails purple diamond crystals.

Merry Christmas~

Related Posts Plugin for WordPress, Blogger...